Must-Know Tips for Wiring Switches and Outlets Yourself
Buying a Dimmer Switch
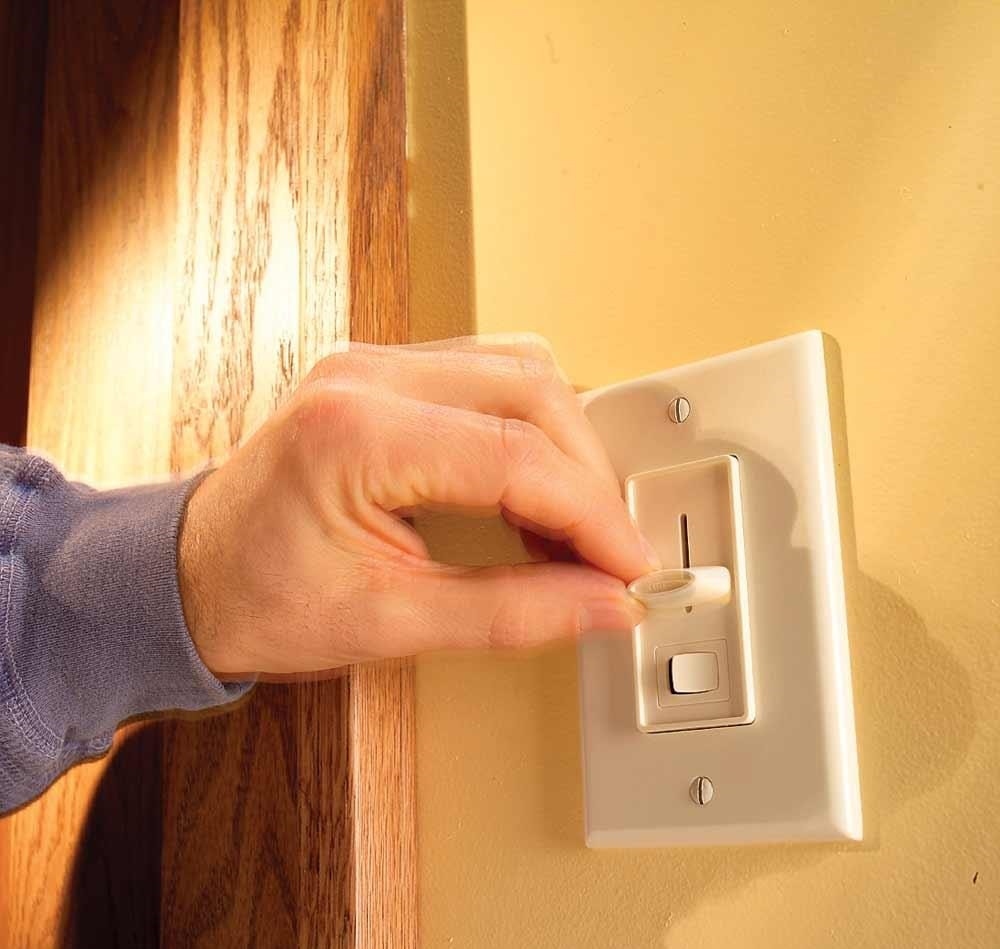
Dimmer switches are available in many styles and configurations, including slides, knobs and touch-sensitive dimming mechanisms. However, check these key things:
Capacity (how many lights it can control). The capacity will be measured in watts. Add up the wattage of the bulbs in all the fixtures the switch controls to make sure it falls within the switch rating listed on the package or instructions.
Single-pole or three-way. Buy a ‘single-pole’ switch if one switch controls the lights or a ‘three-way’ if you have two switches controlling the same lights.
Light type. Standard and halogen bulbs require standard incandescent dimmers. A few fluorescent lights can be dimmed with special dimmer switches, but most can’t. Low-voltage lights may also require special dimmers.
Don’t Reverse Hot and Neutral Wires
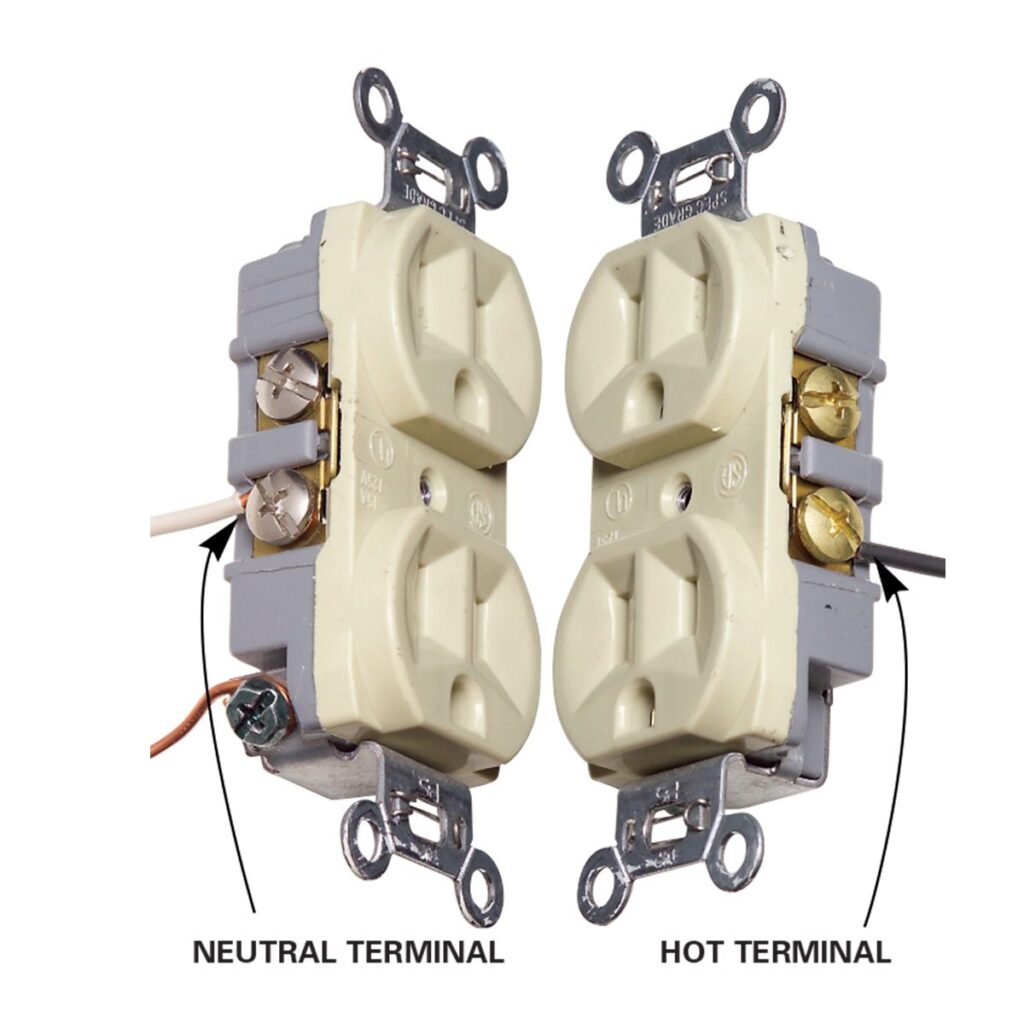
Connecting the black hot wire to the neutral terminal of an outlet creates the potential for a lethal shock. The trouble is that you may not realize the mistake until someone gets shocked, because lights and most other plug-in devices will still work; they just won’t work safely.
Always connect the white wire to the neutral terminal of outlets and light fixtures. The neutral terminal is always marked. It’s usually identified by a silver or light-colored screw. Connect the hot wire to the other terminal. If there’s a green or bare copper wire, that’s the ground. Connect the ground to the green grounding screw or to a ground wire or grounded box
How to Wire a 3 Way Light Switch
We’ll show you how to wire three-way switches. The wiring is more complicated than a traditional single-pole switch, but we’ll explain how to make the connections. Once you’re done, you’ll be able to control a light from two switches.
Cutting Wires Too Short
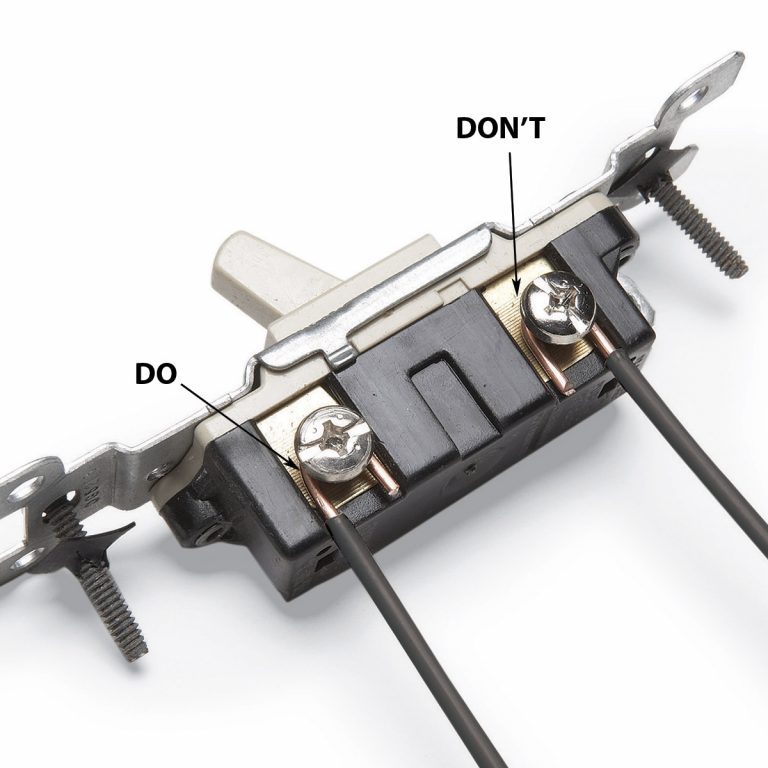
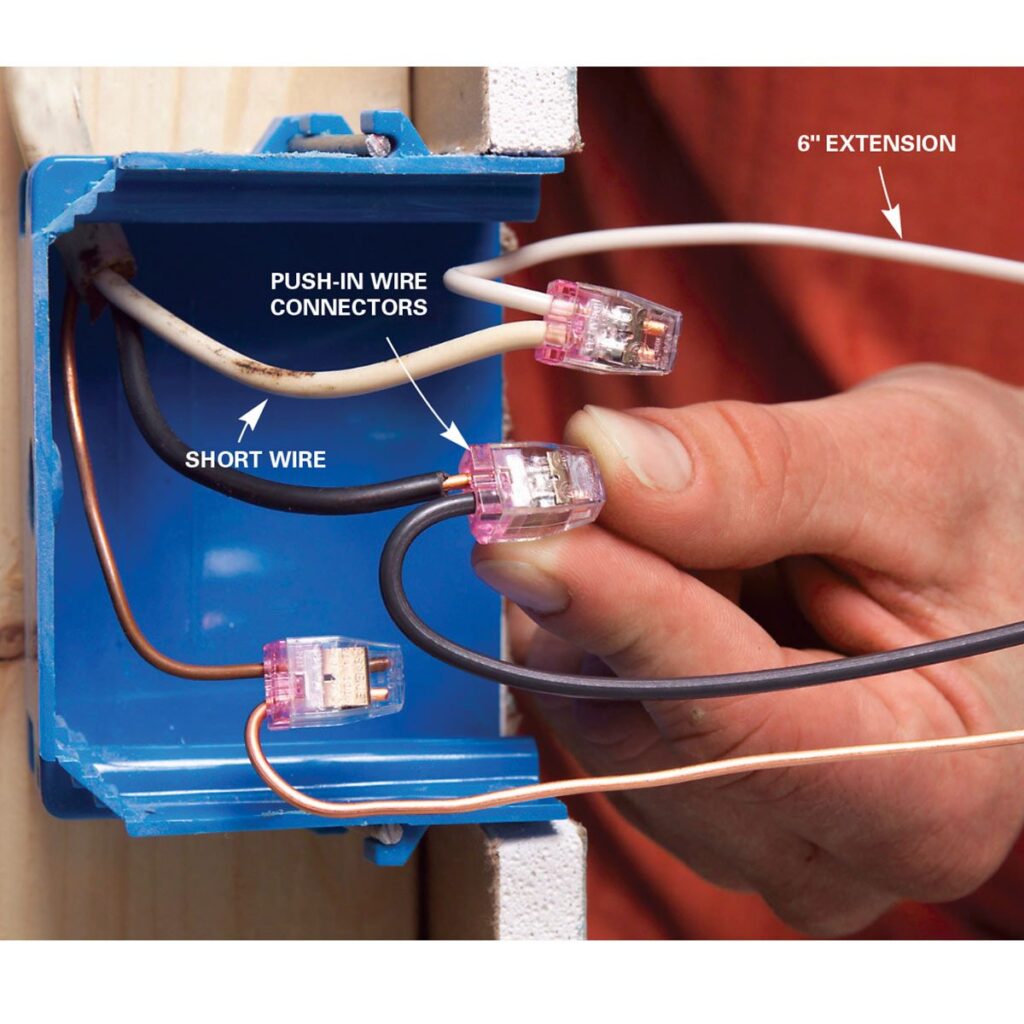
Wires that are cut too short make wire connections difficult and—since you’re more likely to make poor connections—dangerous. Leave the wires long enough to protrude at least 3 in. from the box. If you run into short wires, there’s an easy fix. Simply add 6-in. extensions onto the existing wires. The photo shows a type of wire connector that’s easier to install in tight spots. You’ll find these in hardware stores and home centers.
How to install a manual transfer switch for a backup system
Manual transfer switch installation
A manual transfer switch is installed next to the main service panel to override the normal electrical service with power from a backup generator during a power outage.
Manual transfer switches require an operator to change the power source, while automatic switches detect the loss of power, start the back-up generator, and switch over to the backup power feed. Because the amount of electricity created by a backup generator is not adequate to power all of the electrical circuits in your house, you’ll need to designate a few selected circuits to get backup current.
But, select backup circuits first 🙂
Before you purchase a backup generator, determine which loads you will want to power from your generator in the event of a power loss. Generally you will want to power your refrigerator, freezer, and maybe a few lights. Add up the running wattage ratings of the appliances you will power up to determine how large your backup generator needs to be.
Here are some approximate running wattage guidelines (use this MS Excel Spreadsheet for calculating electrical loads):
Refrigerator: 750 watts
Forced air furnace: 1,100 to 1,500 watts
Incandescent lights: 60 watts per bulb (CFA and LED lights use less wattage)
Sump pump: 800 to 1,000 watts
Garage door opener: 550 to 1,100 watts
Television: 300 watts
Turn off the main power breaker in your electrical service panel. CAUTION: The terminals where power enters the main breakers will still be energized.
Determine which household circuits are critical for emergency usage during a power outage. Typically this will include the refrigerator, freezer, furnace, and at least one light or small appliance circuit.
A Guide to Using Safety Switches
We’re so accustomed to using our electrical home appliances in our daily life that we rarely stop to think for a second that they could cause us harm. Accidents do happen, but more important to remember is the fact that faulty wiring or faulty appliances can cause serious catastrophes, leading to electrical fires, property damage, and injury or even death.
When you get an electric shock, electricity flows through your body to earth. If exposed, it can travel through your heart, interfering with the natural electric impulses that keep it beating, which causes the heart to stop. Safety switches can prevent these types of accidents from happening and are an easy way to keep you family and children safe, so don’t think twice about installing them.
WHAT ARE SAFETY SWITCHES?
Safety switches are your insurance against electric accidents. They interrupt excessive current, and are designed to immediately switch the power off when dangerous levels of electricity leak through faulty switches, wiring or appliances to the earth. This provides a high level of personal protection from a possible electrical shock.
INSTALLING SAFETY SWITCHES
If, however, you’re renting an older home, you may want to consider installing them at your own cost. If you’re renovating or building a new home, you should make sure to install proper safety switches on both the power and lighting circuits no later than 3 months after the property transfer. And if you’re selling a property, you also need to establish if safety switches are installed or not, declaring it on the standard sales contract.
TYPES OF SAFETY SWITCHES
There are three types of safety switches you should be familiar with:
Switchboard of meter box units
Installed on the main switchboard, they can provide either complete protection or selected circuit protection.
Powerpoint units
These safety switches are inbuilt in a single power point, providing single circuit protection.
Portable units
These switches are suitable for use with extension cords and portable power tools.
Proper Heights for Electrical Wall Switches
Many aspects of electrical wiring installation have very specific guidelines set forth by the National Electrical Code (NEC) and local building codes. However, the NEC says nothing about the precise height that electrical wall switches must be. Positioning the wall boxes for switches is left up to the homeowner and the builder. Still, builders and electricians follow some routine building standards to ensure that switches will be located at good working heights for most people. The standard switch positions may vary, however, for unique circumstances, such as in a home occupied by people in wheelchairs or with physical limitations.
Wall Switches in Standard Construction
Typically, light fixture wall switches in standard residential construction are set so that wall switch boxes are somewhere between 48 and 52 inches above the floor. There are a couple of advantages to this. First, it puts the switch at a comfortable height for most people in a standing position. Second, it makes for easy installation of wallboard during home construction. Standard sheets of 4-foot wide wallboard are installed horizontally in most new home construction, and if switch boxes are set at about 48 inches from the floor, it allows for easy measuring, marking, and cutting of the wallboard panels to fit.
The switch box can installed so either its top or bottom is at the 48-inch mark, or it may be centered on the mark. Carpenters installing wallboard can easily cut openings in the panels to fit around the switch box. Placing the bottom of the switch box at 48 inches from the floor means that the top of the box will fall at 52 inches above the floor. This allows the drywall installer to cut the switch box opening out of the top sheet of wallboard, with the bottom sheet lying flush with the bottom of the switch box.
Special Situations
The standard 48- to 52-inch height can be varied for people who find other heights more comfortable, and different standards apply for specialty applications.
Residents With Physical Limitations
If one member of your family is considerably shorter than average or uses a wheelchair, you may want the switches set lower to make them more convenient. Although ADA (Americans With Disabilities) standards do not recommend a specific wall switch height, many builders familiar with these situations recommend that wall switches be set at 36 inches above the floor to put them in easy reach of residents in wheelchairs.
Switches Above Countertops
Switches located above countertops will vary in location, depending on the age of the home and the type of kitchen cabinets. Generally speaking, wall switches should be about 4 inches above the countertop. Since the standard height of most base cabinets with countertop is about 36 inches, this means that the bottom of the switch box should fall at least 40 inches above the floor. This allows the switch to clear a standard countertop.
An Essential Guide to Electrical Switches, Outlets, And Fixtures
Electrical Switches
The light switch is the most familiar electrical switch. Hardware dealers and electricians refer to it as a single-pole switch. On the other hand, a switch that runs lights from two places like the ends of a hallway is called a three-way switch. Some electrical switches are operated with keys, timers, or photoelectric eyes that sense daylight. Some switches are paired up with outlets (a combination switch) and others have their very own indicator light to tell you that the switch is on. There are outside electrical switches that are placed in a special box and operated with a lever. Special dimmers are needed for fluorescent as well as neon lights and loads greater than 1,000 watts.
Electric outlets
For electric devices that are not “hard-wired” or completely wired to the electrical system such as televisions, microwaves, lamps, etc., we use electrical outlets, which are also called receptacles. In the United States, the majority of basic home electric circuits are on a 120-volt line. Conventional outlets have two places to plug in devices and so are called duplex outlets. Contemporary outlets include a half-round hole that receives the grounding plug on an electrical cord. This consists of a wire leading from this hole to the system’s ground to offer protection against shock when a device is plugged into it.
In older homes, electrical outlets aren’t always fitted with grounding plugs; they only have the duplex outlets. If your home’s outlets are like these, you should consider upgrading them to contemporary outlets. This way, you don’t need to use grounding adapters (little plugs that convert the end of a three-pronged plug to two-pronged) anymore.
Electrical Fixtures
Older homes still have single light fixtures placed squarely in the center of each room’s ceiling. Meanwhile, many of today’s houses use a much more sophisticated lighting scheme.
There are three categories of lighting:
General lighting
Also known as ambient lighting, general lighting provides overall illumination by way of a ceiling or wall-mounted fixtures, chandeliers, recessed lights, or track lights.
Task lighting
This type of lighting is more specific. This supplies direct light for tasks like reading, sewing, and cooking.
Accent lighting
This is used to spotlight objects or highlight interesting aspects of a house, therefore creating dimension and drama. If it’s time to redecorate your home, looking into lighting is a great place to start.
